
When artists create paintings and display them in a gallery, they present their work in a way that is flattering to the subject. Mounted, framed and hung in amongst other works of art.
Likewise, when a diamond is found in its raw state, it is cut, polished and mounted to maximise its qualities of colour and clarity before being displayed as a piece of jewellery.
In the digital age of photography, we can also present our images in a manner that is becoming of the love and attention imparted in them during the post-processing stages, the pre-visualisation, the depth of feeling experienced at the time of shooting the image, and the amount of emotional amplification applied, are no different to the jeweller or the painter. When all is said and done, collectively, we are all artists using different mediums to show our work at its best.

A simple, wide border, placed around a photograph is one way a finishing touch can be added to draw the viewer to concentrate within the image itself. Sometimes it can be desirable to add a title and the makers name as well, I can show you how that can be done too.
Like most things with photographic editing, there are usually several ways of achieving the same outcome. It really boils down to using the method that suits the task and is easy to achieve – as long as you know what it is that you want to achieve. Sometimes that in itself is not always quite so obvious. I’ll now walk you through my process from start to finish.
The following steps will illustrate the method I utilise to place a wide white border around an image. This border is outlined with a fine black edge so it will stand out on a white background such as a projector screen or in a book. The image is further enhanced by a second black line set much closer, only 3 or 4 millimetres away.
I always do all my editing firstly in Lightroom, then Photoshop, and save a copy before adding the final touch of adding a border. The border is applied in Adobe Photoshop 2020 in my case.
The steps…
- Increase the canvas size.
1. In the top menu bar go Image > select canvas size in the drop down menu box
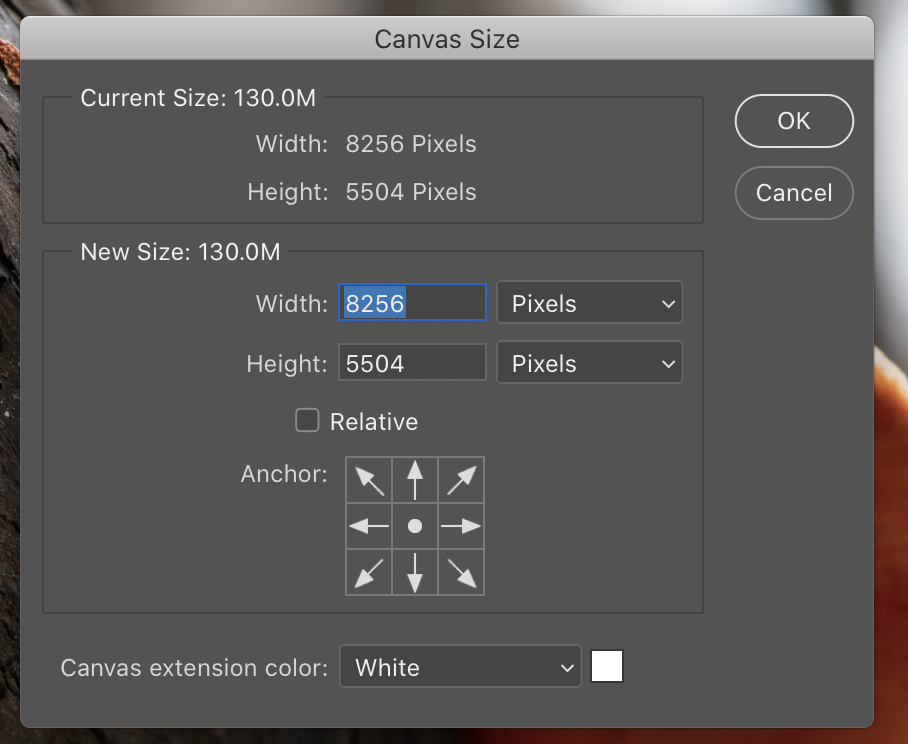
2. Change from Pixels to Percent and make the longer side 120% and the shorter side 130%
3. Make sure the canvas colour is WHITE (or any other colour if you’d prefer something different to white) and click OK

4. Your image should then look like this
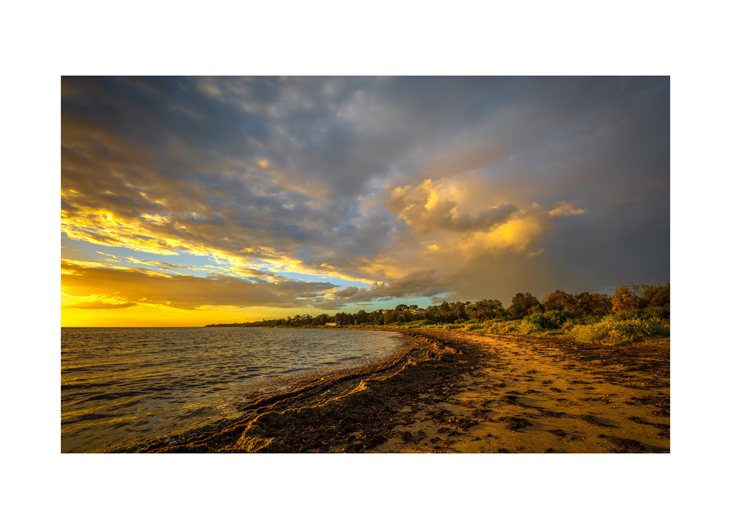
The image above has a white border but is not visible on a white background.
5. If you want a black edge to the canvas for showing on a white display screen such as a projector.
Select the Marquee tool from the tool bar and drag it diagonally from corner to corner.> This will give you what I call “marching ants” as shown below.

6. Next step, from the top menu bar go > Edit > Stroke and the drop down menu example will appear.
7. Select Width 3px (or wider if you so choose, I only want a fine line) > Colour black > Location INSIDE (not Centre or Outside) > click OK

8. Next, click the cursor just outside the image and the marching ants will change to a 3 px wide black line as in the image below.

9. Using the Marquee tool again, draw another set of marching ants 3- 4mm outside the photograph by draging the mouse diagonally across, making sure the spacing is even on all sides. Release the mouse button as in steps 6- 7 above to achieve the marching ants as you see in the image below.


10. Next, click the cursor just outside the image and the marching ants will change to a 3 px wide black line as in the image below.

Finally, use the Horizontal Type Tool if you wish to add a title to the image.

In Closing: Not every image requires a wide border nor a descriptive title. I have shown you how I achieve the outcome that I desire for special presentations. As I said at the outset, I’m sure there are several other ways to achieve a similar result. Find the method that best suits your workflow and stick with it.
Greg
