Long Exposure Photography Using a 10 stop Neutral Density Filter
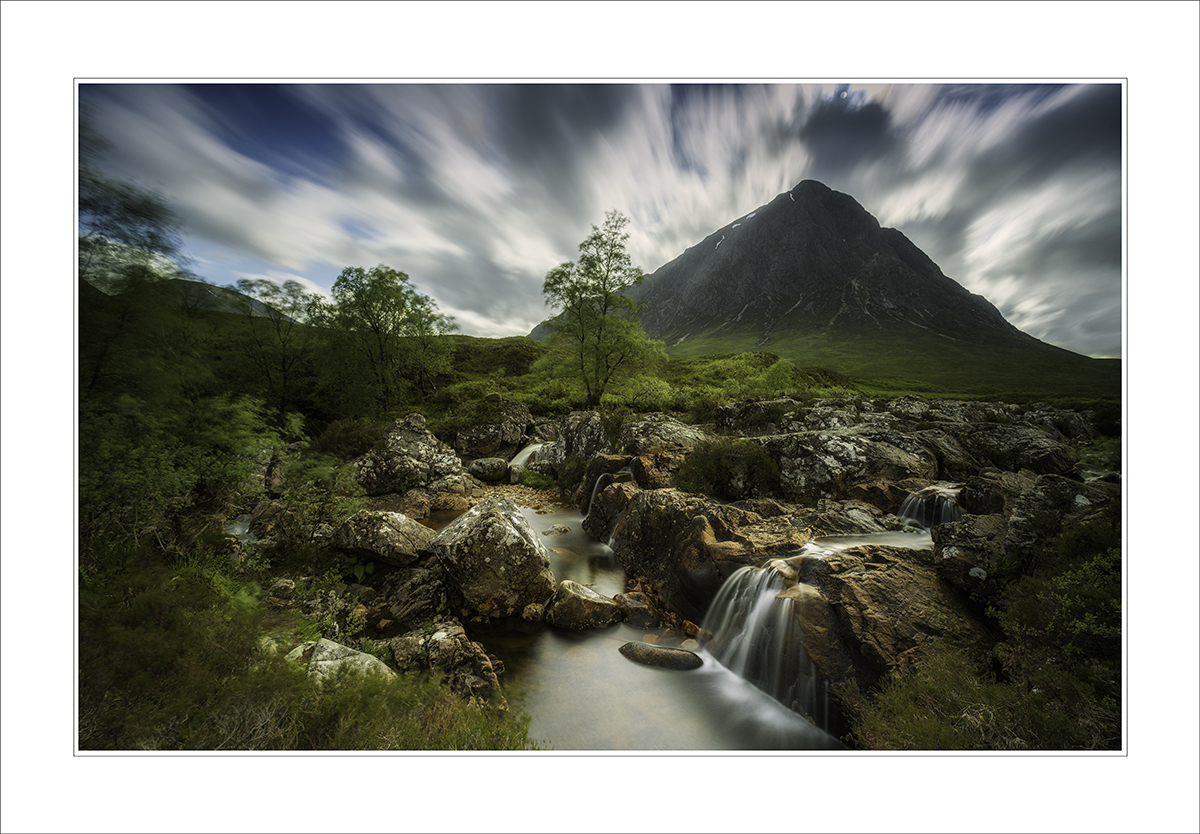
30 seconds
If the following steps are followed carefully, newcomers to this style of photography will quickly achieve impressive results. Deviation from the procedure will quickly render unexpected and usually undesirable effects and lead to frustration.
The principle to remember is that we are trying to extend the period of time that the shutter needs to remain open by placing a dark filter in front of the lens, and thus recording motion in the image as blur. During the exposure, it is paramount that there is no movement of the camera or light leakage into the camera via an ill-fitting filter or through the camera’s eyepiece.
Of course, we need movement of some elements of the image, usually water or clouds, or a combination of both, as well as static parts of the image such as structures or other immovable objects such as rocks.
Preliminary set-up
- Adjust your camera to its lowest ISO setting. This may be 100 or in some cases 50
- Make sure “auto ISO” is turned off if this is a setting you sometimes use and forget.
- Set your camera to Aperture Priority and a small aperture (big number) say f16 or smaller.
- Set your lens to Auto-Focus
- Mount the camera on a tripod
- Compose the shot and pre-focus
- Take a test shot and make a note of the shutter speed.
Now you are ready to progress to the second part of the process.
- Calculate the exposure that will be required once the 10-stop filter is attached. Remember you have to double the time in step 7 above, 10 times. For example, 1/30th second becomes 30 whole seconds. The doubling goes like this starting with your base of 1/30th sec: 1/15th, 1/8th, 1/4th, 1/2, 1 sec, 2 sec, 4 sec, 8 sec, 16 sec, 32 sec. There are phone apps and calculation charts for this that make it easy to do the maths.
- If the new exposure is less than 30 seconds, you may remain in aperture priority, otherwise, follow the next step.
- Put the camera’s mode dial into manual mode. Aperture priority will only work for 30 seconds or shorter exposures, and you may end up wanting more.
- In Manual mode, dial in your desired aperture and shutter speed in seconds up to 30. Longer than 30 seconds requires the BULB setting and a cable or remote release and a watch or some other timing device.
- Switch the lens to Manual Focus being careful not to disturb the focus setting in step 6 above.
- Switch off image stabilisation if you have it.
- Carefully attach the 10 stop filter making sure not to push hard enough on the lens to cause the zoom setting to move or the focus ring to move.
- Cover or shield the eyepiece to prevent light from entering and affecting the exposure.
- Take the shot and check the image either on the review screen or look at the histogram.
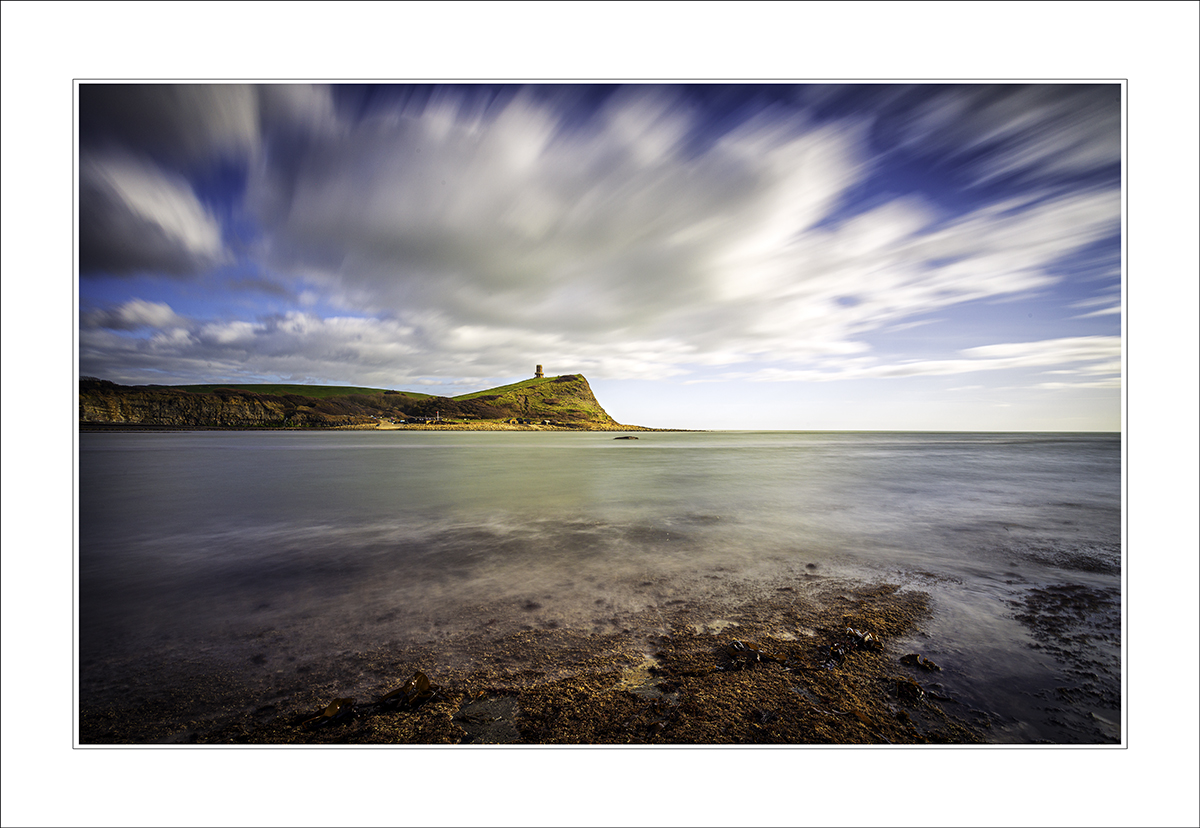
Looking at the following examples, I think you will agree that once you master the technique for long exposure photography, it will open up a whole new dimension to your images.

15 seconds

30 seconds

90 seconds

179 seconds
25 seconds

3 seconds

2 seconds
